Drainage systems are critical for maintaining a healthy and functional living environment. Proper drainage installation prevents water accumulation, protects foundations, and ensures hygienic conditions by efficiently transporting wastewater away from buildings. In this blog, we’ll explore the key steps and considerations for top achievers in the field of drainage installation.
Planning and Design
Effective drainage installation begins with meticulous planning and design. Start by assessing the site to understand the topography, soil type, and existing water flow patterns. This helps in designing a system that effectively channels water away from the property.
- Site Survey: Conduct a thorough site survey to identify potential water sources and areas prone to flooding. Use this information to plan the layout of your drainage system.
- System Design: Design the drainage system with a focus on gravity-assisted flow. Ensure that pipes have the correct slope (typically a 1-2% gradient) to facilitate water movement.
- Compliance: Ensure your design complies with local building codes and regulations. This may involve obtaining permits and adhering to specific guidelines for pipe sizes and materials.
Material Selection
Choosing the right materials is crucial for the longevity and efficiency of your drainage system.
- Pipes: Common materials include PVC, ABS, and cast iron. PVC is lightweight and easy to work with, while cast iron is durable and often used for high-traffic areas.
- Gravel and Sand: Use gravel and sand for creating drainage beds. These materials help in filtering water and preventing pipe clogging.
- Geotextiles: Employ geotextile fabrics to prevent soil and debris from entering the drainage system while allowing water to pass through.
Installation Steps
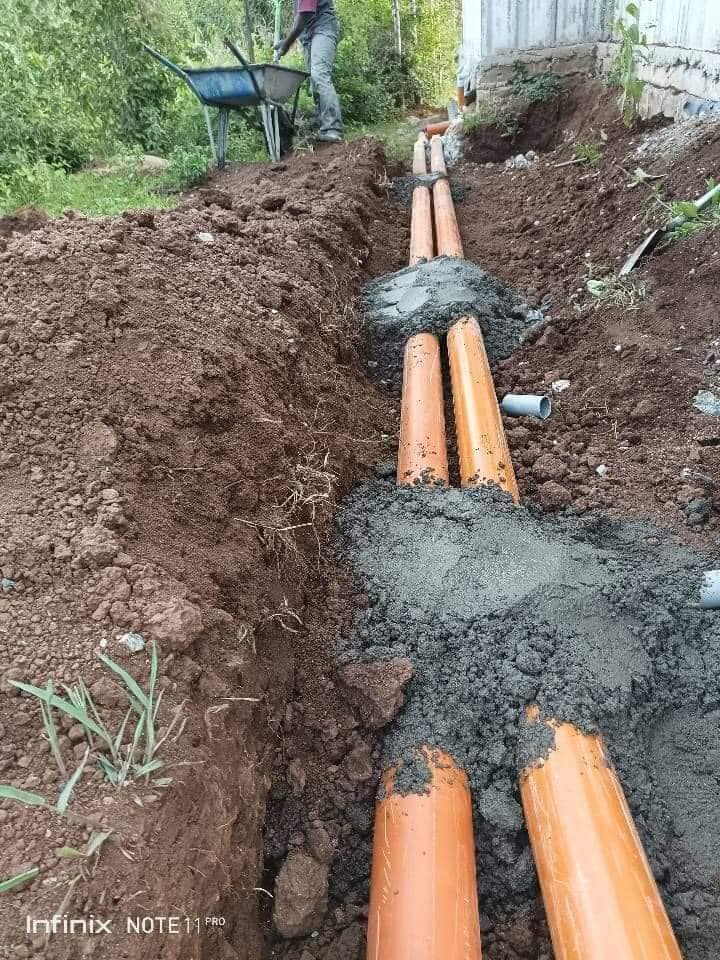
1. Trenching
Excavate trenches following your drainage plan. The depth and width of the trenches depend on the pipe size and the volume of water to be managed.
- Excavation: Use appropriate equipment to dig trenches, ensuring they follow the planned slope.
- Trench Depth: Typically, trenches should be at least 18 inches deep for residential drainage systems.
2. Pipe Laying
Carefully lay the drainage pipes in the trenches.
- Pipe Placement: Place pipes at the correct slope to facilitate gravity flow.
- Joining Pipes: Use appropriate connectors and ensure all joints are securely sealed to prevent leaks.
- Bedding: Lay pipes on a bed of gravel or sand to provide stability and aid in water filtration.
3. Backfilling
Once the pipes are laid, backfill the trenches with suitable material.
- Initial Backfill: Use gravel or sand to cover the pipes initially. This helps in stabilizing the pipes and enhancing drainage.
- Final Backfill: Cover the gravel layer with soil, compacting it gently to avoid shifting the pipes.
4. Installing Drains and Catch Basins
Drains and catch basins collect surface water and direct it into the drainage pipes.
- Positioning: Install these components at low points where water naturally accumulates.
- Connection: Ensure they are securely connected to the main drainage pipes.
Testing the System
Before concluding the installation, test the drainage system to ensure it works effectively.
- Water Flow Test: Pour water at various points to check for any pooling or slow drainage.
- Leak Test: Inspect all connections and joints for leaks. Re-seal any problematic areas.
Maintenance Tips
Regular maintenance is essential to keep your drainage system functioning optimally.
- Inspection: Periodically inspect the system for blockages, leaks, or any signs of wear.
- Cleaning: Clean drains and catch basins regularly to prevent debris build-up.
- Repair: Promptly address any damage to pipes or drainage components to avoid more significant issues.